Table of Contents
Step 1: Physician and Patient consent after referral
Step 3: Confirm the Medical Eligibility
Step 4: Confirm the Financial Eligibility
Step 5: Confirm the Patient's interest in the Program
Step 6: Upload Financial (and other relevant) documents
Step 7 or 8 (OPTIONAL): Financial Interview
Step 7 or 8 or 9: Appeal/Pre-Enrollment
Final Step: Set the start of treatment date
Foreword
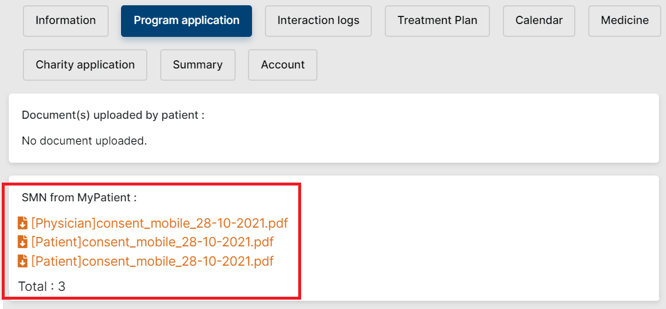
When a Patient is referred and their Application starts, their status is “Registered.” Should the patient use the Axios MyHealth app, any document uploaded via the app will appear at the top of the application screen:
 Related Articles
To learn more about MyHealth, please check the dedicated MyHealth section of the Axios+ User Guide.
As part of our quality insurance processes, it is the responsibility of Axios to download, verify, and re-upload under the correct category each patient upload. Should the documents not be qualitative enough, Axios will reach out to the patient and log that interaction through the interaction log.
Good to know
Each application step completed will trigger an Interaction Log.
Navigate to the Interaction Log tab and edit the interaction to add any report or relevant information to the log

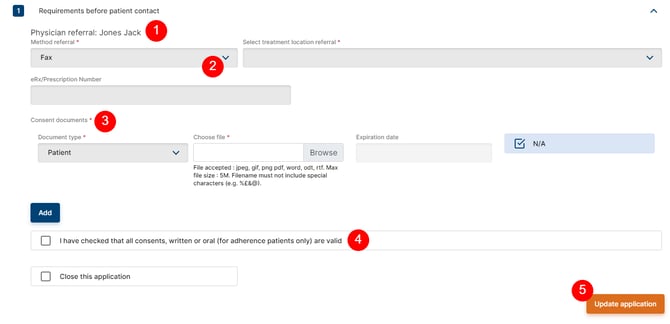
Step 1: Physician and Patient consent after referral
-
The referring Physician is pre-entered
-
Select the referral method (how you heard about this Patient) and the referring hospital
-
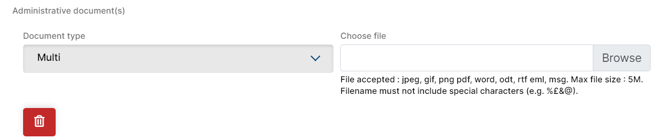
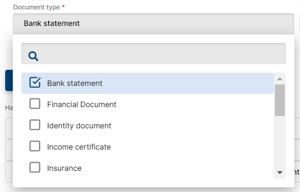
Upload the mandatory documents:
-
Physician and/or Patient consent forms, and enter document the expiry date
-
If both are under the same file, upload under the “Patient & Physician consent” type
-
-
Check all documents and confirm their validity
-
Update the application
Step 2: Program Introduction
At this point, the Patient status is "Referred".

Conduct the usual Program Introduction with your Patient and fill in the contact method and whether you were able to reach out to the Patient and update the application.

If the Patient is not reachable, select the reason and save. Try again later, until you have been able to reach them.

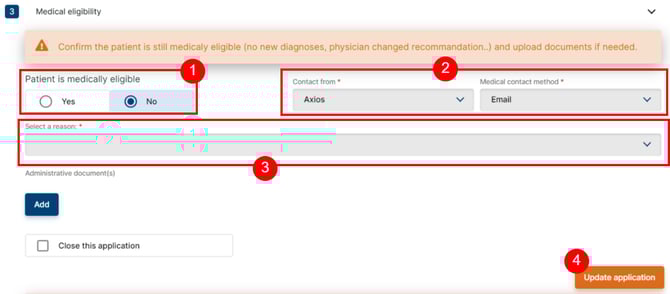
Step 3: Confirm the Medical Eligibility
At this point, the Patient status is "Introduced".
This step is to confirm the Patient is medically eligible.
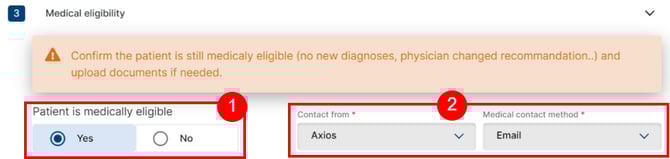
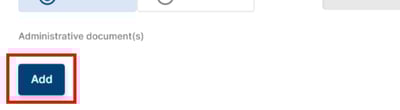
You should upload the Prescription at this stage, and any other relevant documentation to justify the choice of eligibility. Click on the "Add" button to add as many documents you want.
Should the Patient not be medically eligible:
-
Provide a justification and save.
-
Fill out the contact from and method
-
Select a justification
-
Save
The Patient will be stopped in the Application process and be considered as referred but not enrolled in the Program data.
 IMPORTANT
Depending on the program configuration, the Medical Eligibility step may not be possible to complete before having completed the "Patient Needs Assessment Tool (PNAT)" questionnaire.
For more information related to PNAT interview, please refer to the Patient Needs Assessment Tool (PNAT) article.
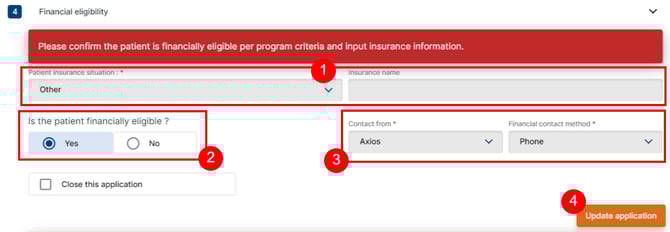
Step 4: Confirm the Financial Eligibility
At this point, the Patient status is “Patient is medically eligible”.
-
Select the Patient’s insurance situation and, if applicable, the name of their insurance.
-
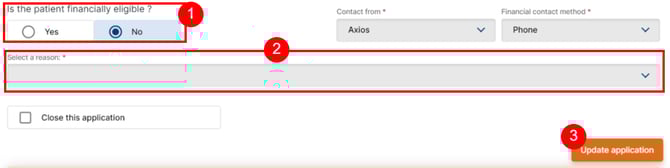
Confirm they are financially eligible
-
Fill Out contract from and method
-
Update the application.
Should the Patient not be financially eligible, provide a justification and save.
The Patient will be stopped in the Application process and be considered as referred but not enrolled in the Program data.
Step 5: Confirm the Patient's interest in the Program
At this point, the Patient status is “Patient is financially eligible”.
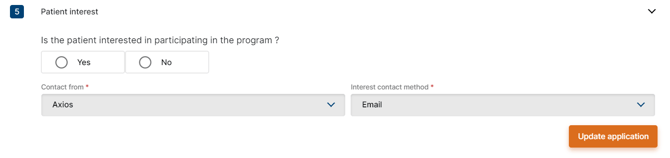
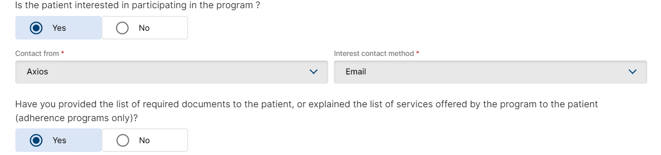
This step is to confirm the Patient is still interested to participate in the Program. It is also a confirmation you have provided them with the list of all documents they must provide.
Good to Know
 If the Patient is still interested but the list of documents has not been provided yet, the Patient status is “Axios needs to provide documents needed”.
Should the Patient not be interested anymore, provide a justification, and save.
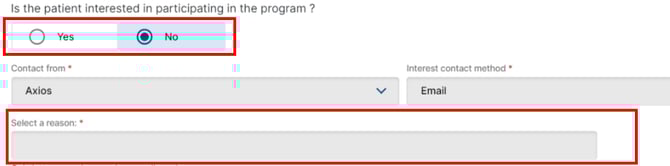
The Patient will be stopped in the Application process and be considered as referred but not enrolled in the Program data.
Step 6: Upload Financial (and other relevant) documents
At this point, the Patient status is “Pending documents”.
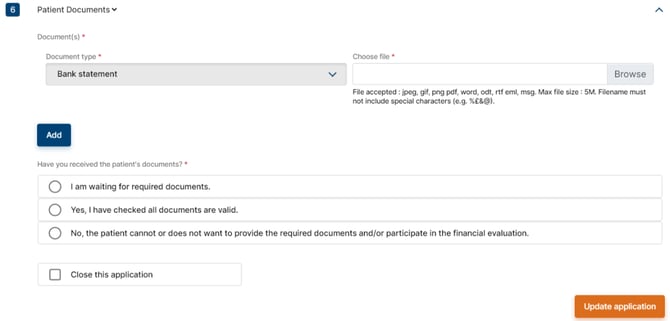
In this section, you should upload all mandatory documents for a Patient to be enrolled: ID document, income certificate, rent contract, etc. At least the ID document is mandatory. You are responsible to check the validity and clarity of all uploads.
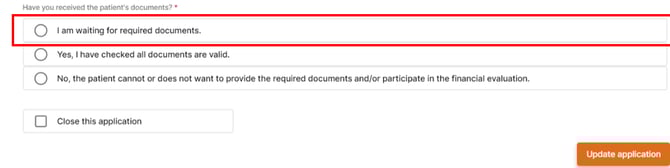
This step can happen in several iterations, uploading each document one by one, choosing “I am waiting for required documents” and saving.
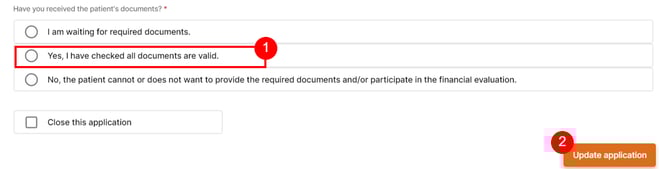
Once all documents have been uploaded, select “Yes, I have checked all documents are valid” and save.
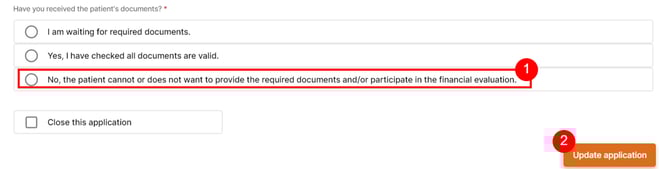
Should the Patient not want to provide the documents, select “No, the Patient does not want to provide the required documents and/or participate in the financial evaluation” and save. The Patient will be stopped in the Application process and be considered as referred but not enrolled in the Program data.
Step 7 or 8 (OPTIONAL): Financial Interview
In case your Program Settings stipulates a Financial Interview is required, this additional step will display for all Patients referred to your Program.
Even if a Financial Interview is required, it can remain optional depending on the program configuration. If Financial Interview is set as optional for this program, an extra step "Include optional financial interview" will show at step 7, to record if a Financial Interview is needed for this application

Financial Interview
IMPORTANT NOTE BEFORE READING
The following section applies to the Financial Interviews conducted for programs that are not using the ATT v.2 platform.
If your program is using the ATT v.2 platform, refer to the ATT platform (PFET v2) article to learn how to conduct Financial Interviews and to calculate the PFET score with the dedicated platform.
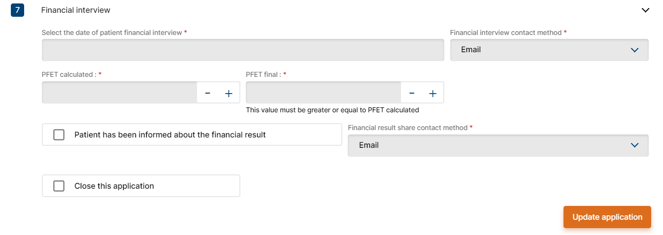
At this point, application has reached step 6 "Patient Documents" or step 7 "Include optional financial interview" (if Financial Interview are set as optional for this program).
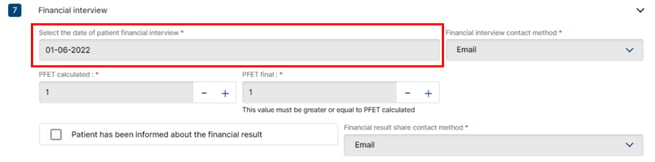
Select when the interview is conducted and input the result of the PFET. Reach out to the Patient to inform them of the final score and update the application.
Good to know
In specific cases, the Patient can appeal the PFET score (Optional Step 8). Come back to this step to fill in the final PFET score.
Upon completion of this step (the PFET has been calculated and communicated to the patient), the eligibility letter becomes available in the patient’s application file, on the right-hand side of the screen.
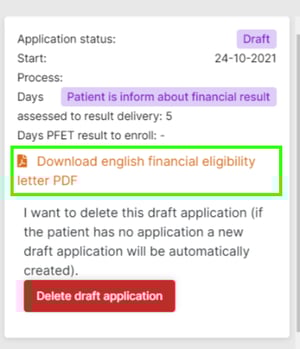
You should then download it and provide it to the patient through the preferred communication channel for them to sign and return it.
The PFET score is used to automatically allocate the treatment plan template to the patient, along with prescription and insurance situation. Make sure to double check the score before validating, as it is a critical information for patient's journey.
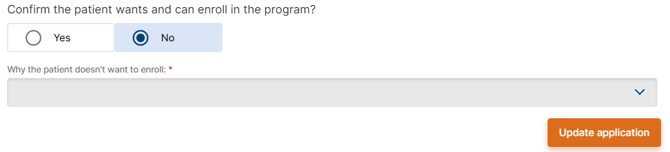
Step 7 or 8 or 9: Appeal/Pre-Enrollment
At this point, the Patient status is “Documents completed”
Otherwise, this is the last confirmation from the Patient to be enrolled in the Program.
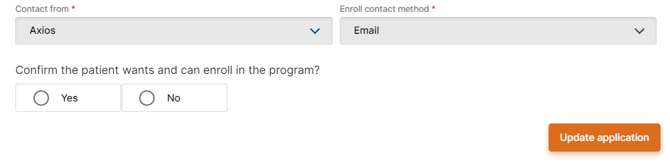
If there was a financial interview, the patient can now appeal the result, or confirm they are fine with it.
Should the Patient not want to be enrolled, select no, and select a reason. The Patient will be stopped in the Application process and be considered as referred but not enrolled in the Program data.
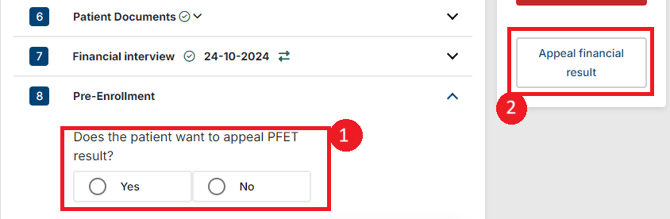
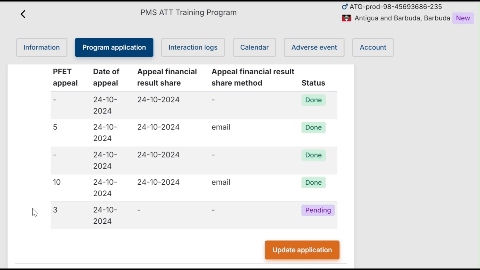
Capturing Multiple Appeals
Additionally, for programs with ATT v2 enabled, you can now log a second or even third appeal for your patients through either Step 8 (pre-enrollment) or via the dedicated button in the aside shown below:
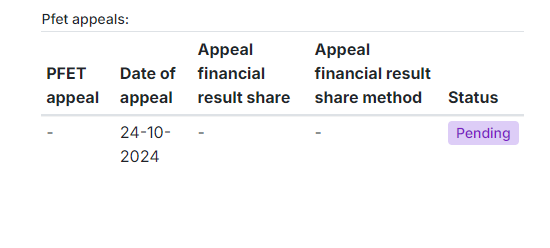
After confirming the appeal, you'll notice that the table in Step 7 has been updated to display information about your previous and current appeals.
From here, the PFET team will be able to review the appeal on ATT v2 and record a new appeal result. When the appeal has been reviewed and the new score has been approved by the PFET team, it will display on PMS in the PFET Appeals table as shown below:
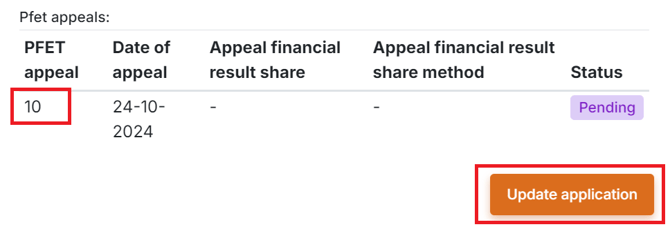
IMPORTANT NOTE
Do NOT click on "Update application" until the PFET appeal column has been populated with a score for your requested appeal.
If the result is not showing, it simply means the result from ATTv2 hasn't synced with PMS, in which case, please refresh the page. When the result displays in the Appeals table, you can update the application via the button above.
Remember when updating Step 7 to click the Patient informed checkbox and make the appropriate selection from the Financial result appeal share section.
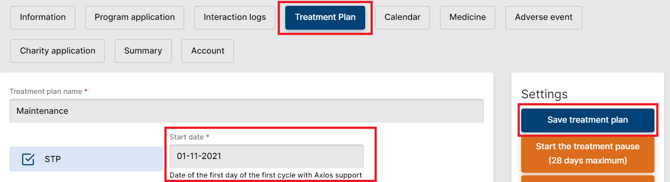
Final Step: Set the start of treatment date
Now that your patient has been pre-enrolled, and if applicable, allocated a treatment plan, the last step is to configure the system with the start of treatment date.
-
Navigate to your Patient’s Treatment Plan tab
-
Enter the start of treatment date
-
Save the treatment plan
Related Article
Learn more about Treatment Plan management in the Manage a Patient’s treatment plan article.
Patient Enrollment
At this point, your patient appears as "Pre-Enrolled". The patient will be considered as "Enrolled" once the first MedPack with an acquisition date set has been validated in the Patient > Medicine tab.
![]() Going Further
Going Further
A useful recap of all Application Statuses in a handy table is available in the Application Status Mapping article.